Introducing poppy seed heads
Did you know that I touch every poppy seed head 40 times from start to finish? Yes, I counted!!!
Because I manipulate each piece with my hands and/or the use of various pottery-tools and equipment in many steps along the way.
Remember: Each Poppy Seed Head is individually handmade by throwing clay on the wheel. Following that I alter and model each one to the achieve the final shape.
The making…..
Firstly I centre a larger amount of clay and continue to work on a portion of clay on the top (throwing of a hump).
To start I open up the lump of clay and I throw the body of the seed head including the stem. Then I use a cheese-cutter to create the facets.


After that I take each seed head off the hump and leave it to dry until the next day to finish the piece.
When the seed head is leather-hard I turn it around and place it on a chuck.
Then I take a piece of clay and attach it securely to the top.
Once secured I throw this piece of clay into a bowl shape and flatten it out into a disc.
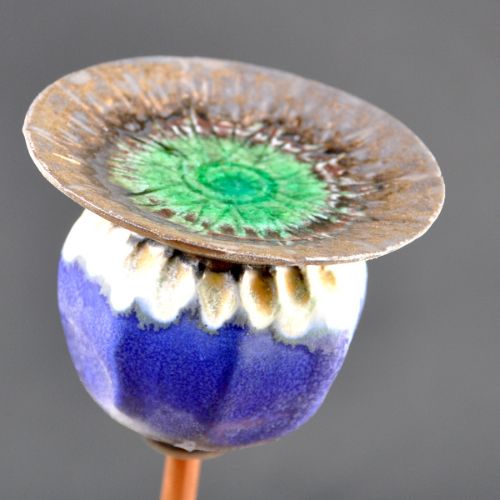
Finally I sculpt it with patterns on top of the crown. There might be stars or Icicles or flowers……
additional care is needed…..
In addition the seed head needs a support to be able to stand up during the glaze firing.
To do that every piece gets its individual clay-support, which I can only use once as the clay shrinks together with the clay body of the piece. Naturally this shrinkage can’t be repeated.
Ultimately the clay support will end up in the bin after it has done its job.
And this is the reason why you can see 4 little marks on the bottom of each seed head.


the next stage: glazing
The glazing happens in several stages:
First I glaze the base of the piece with a semi-gloss black glaze. This is because this glaze doesn’t run and it should be easy to remove the support after the glaze firing.
After that I brush on the bronze glaze on the top of the seed head, leaving out the middle part, in which I want to put coloured glass before the glaze firing.
Finally the body of the seed-head is dipped into the main glaze.
In addition I sometimes brush on another glaze is to give some texture or add more detail.
Once I placed the poppy seed heads securely in the kiln (sitting on their supports), I add powders of coloured glass to the middle of the crown.
Following all that the glaze firing is up to 12800C or Cone 6 for the potters.
Last steps….
After the glaze firing I have to take the supports off and I grind off any sharp edges left behind. For this step I use a Dremel tool.


The poppy seed head is now ready for display!